Home - Map - Prostate Cancer - Cycletouring - Highpath - EGGrings - Swing Crank - BROX - Cycle Tech - RISC OS
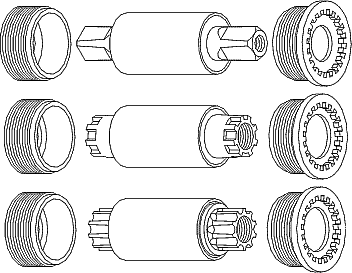
'Bottom bracket' is the strange name given to the axle assembly upon which cranks turn. Modern 'sealed' ones have replaced the separate axles, cones and balls of yesterday - they don't need any maintenance and usually give excellent service for many years. There are three main designs and you must select the one which matches your cranks:

There are two versions of this design. Both have 2° tapers but JIS (Japanese) ones are slightly fatter than ISO (European) ones; this means that a crank goes further onto an ISO axle than a JIS one. However they can often be mixed so long as each crank mates with at least 2/3 of its axle taper without bottoming on the end.
Shimano have produced 2 versions of this design. They are incompatible with each other and with every other make of crank. And the miniature ball bearings are prone to early failure.
Arguably a better design than both the square-taper and Octalink as the axle is stiff and the drive is positive. But the miniature ball bearings are prone to early failure.
Alternative systems are offered by several manufacturers, including outboard bearings, splined cranks secured to splined axles with pinch-bolts, and cranks with axles permanently bonded into them. Each design has its merits but none has yet achieved the status of becoming a long-term standard.
Whichever system you use, select the axle length which gives the correct 'chainline', placing the mid-point of your chainrings directly in line with the mid-point of your sprockets, within a millimetre or two.
When fitting a new crank, put it on your old bottom bracket first and work out how much longer or shorter the axle should be before buying a new one of the correct length. For example, a 10mm longer axle will increase the chainline by 5mm assuming, that is, that the axle is symmetrical (which ISIS ones always are).
If there isn't a drain hole in the bottom of your frame's bottom bracket shell, drill a 3mm one before installing anything. Otherwise water, which will inevitably find its way into your frame, will collect in the bottom bracket shell and damage the bearings.
The units illustrated above are often installed with a 'Shimano' splined tool, which is much easier to use than traditional peg- and pin-divners. Before installing a bottom-bracket, clean and lightly grease the threads in your frame and the insides of the bottom bracket 'cups'; this aids assembly and ensures that nothing will seize. The left-hand cup has a normal right-hand thread and is installed by turning it clockwise, but the right-hand one has a left-hand thread and must be turned anti-clockwise .
There are two very important points to remember when fitting cranks:
Similarly, clean and lightly grease the pedal threads and tighten the pedals firmly. If you place a thin 'pedal washer' on each thread first, you can prevent steel pedal spindles from damaging aluminium cranks.